Cloning Configurations
Using Configuration Cloning
A common scenario when using MSO is to create your first configuration and optimize it. Then, if you're not fully satisfied with the results, you can try different changes to see what works best. For instance, you might want to see the effect of having different numbers of PEQs per sub on the result. In making the various changes, you'd like to preserve the previous states to make comparisons. One way to do this is to run the Configuration Wizard again. Improvements to the Configuration Wizard in MSO v2 make this much easier than before, but you'll need to set up the graphs and optimization options each time if you do that. If you use the configuration cloning feature and choose to clone the configuration's graphs, the options of the original graph or graphs will carry over to the newly created configuration.
You can clone a configuration in two different ways.
- Choose Config, Clone from the main menu, or;
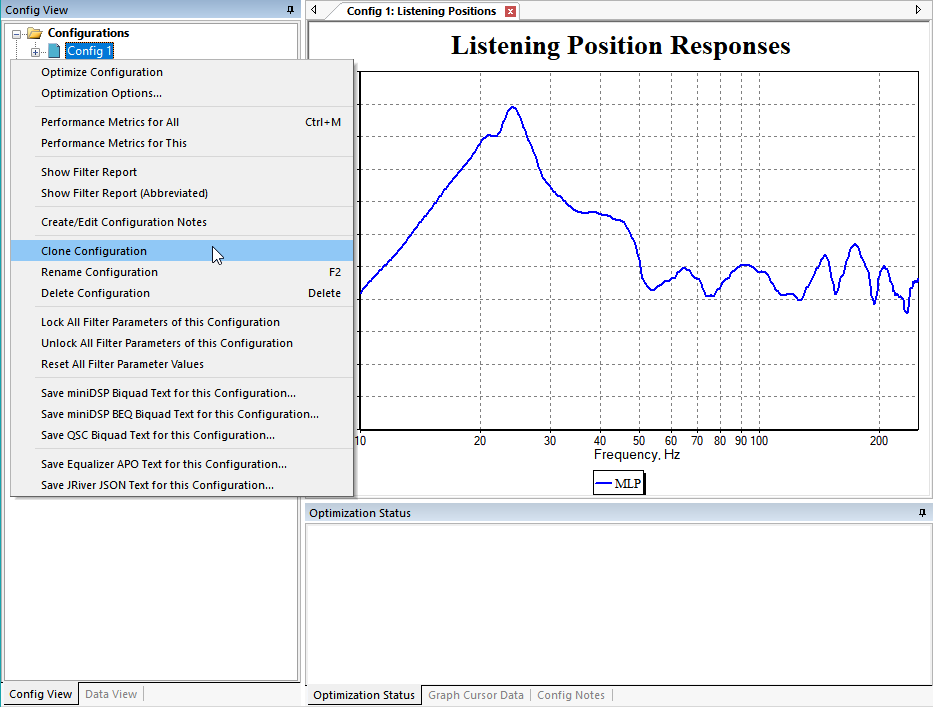
- In the Config View, right-click on the node of the configuration you wish to clone, and select Clone Configuration.
Cloning a Configuration From the Main Menu
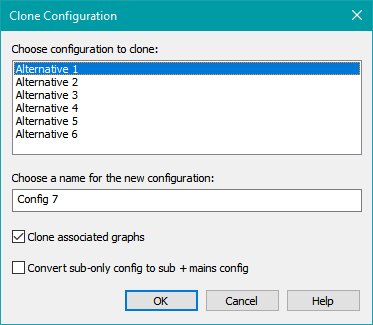
If you choose Config, Clone from the main menu, the Clone Configuration dialog box will be shown.

Choose the desired configuration to clone, and a name for the new configuration. Make sure that the Clone associated graphs option is checked. Then click OK. The cloned configuration initially takes on all of the properties of the original, but it is completely independent of the original in all other respects. To rename the newly-cloned configuration after cloning it, click its name in the Config View and press F2.
Cloning a Configuration From the Config View
If you chose to clone a configuration by right-clicking on its root node in the Config View, the resulting dialog will appear as below.

If you clone a sub-only configuration, you have the option of making the new configuration a sub+mains configuration. Sub+mains configurations cannot be converted to sub-only configurations by cloning.
Cloning Associated Graphs
When you choose the Clone associated graphs option in the Clone Configuration dialog, MSO will search the project for graphs that contain traces referring to the configuration to be cloned. If it finds any such graphs, it copies each graph, along with all its options, giving it a new name. The traces of the newly-created graph that previously referred to the original configuration are then changed to refer to the newly-created configuration. In this way, if you had set up all the graphs you needed for the old configuration, you'll have all the graphs you need for the new one too. You'll probably want to change the name of the newly-created graph or graphs to your liking.
Changing the Number of Filters in the New Configuration
When you clone a configuration, the new configuration will have the same number and type of filters as the original one, and all the filters will have the same parameter values as the original. But if you want to evaluate the effect of different numbers of filters, you need a way to add or remove filters in the new configuration. Before doing this, you should be familiar with how the Config View represents the structure of a configuration. By looking at this structure, you can identify the sub input filters (shared filters) and the filters for the output channels. These channels will have the same names that you gave for the subwoofers themselves in the Configuration Wizard.
Reducing the Number of Filters
To reduce the number of filters in a channel, just select a filter in that channel and press the Delete key. Repeat for as many filters as needed in the channels you want. If you accidentally delete a filter, you can use the technique below to add filters back.
Increasing the Number of Filters
Broadly speaking, there are two ways to add filters to a channel.
The hard way is to right-click on the Filters node of a channel in the Config View (or the Shared Filters node for input filters) and select the type of filter you wish to add from the context menu. Performing this selection adds a filter of the specified type to the channel you choose. This technique is meant for cases where you wish to add any type of filter supported by MSO that may not currently be present in the configuration.
The easy way is to select a filter of the same type as what you wish to add (usually a PEQ), and press Ctrl+C to copy it to the clipboard. Once it's in the clipboard, it can be pasted as many times as you like by going to the destination and pressing Ctrl+V. To paste it to the destination, you must select the Filters node of the channel into which you want to paste it (or the Shared Filters node for input filters). You can check whether pasting is allowed by looking at whether the Paste toolbar button is grayed out or not.
Repeat this action as many times as necessary to get the desired number of PEQs per input and output channel. For more information, see the Copying and Pasting Filters topic in the Tips and Tricks section.
Comparing Results
Once you have created multiple configurations, modified them to try out various conditions, and run optimizations on them, there are two ways to compare the optimization results of the different configurations.
- Place the response curves of all listening positions for all configurations on the same graph and inspect the results.
- Use the Configuration Performance Metrics dialog to compare various numerical errors (seat-to-seat response variation, SPL penalty, flatness error of the MLP and so on) for the configurations of interest.
The Configuration Performance Metrics dialog has already been discussed. We'll discuss using graphs for visual comparisons of configurations next.