Getting Started With the Wizards
Choosing Measurement Names
As mentioned previously, MSO measurement names are just shortened versions of the file names of the measurements you saved as text from within REW. These file names are determined from the information in the text boxes of the measurements on the left side of the REW main window. See the figure below.
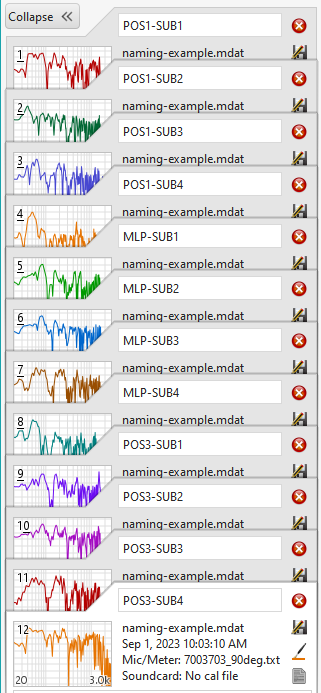
This example shows 4 subs (SUB1, SUB2, SUB3 and SUB4) measured at 3 positions (POS1, MLP and POS3). If we can see at a glance from each measurement name which sub and listening position are being measured, then the measurements are well named. That's the case here. It's a good practice to put the listening position first in the name. In the unlikely event that MSO's automatic name matching algorithm does not succeed when running the Configuration Wizard, manual matching of the measurement name to the listening position and sub name will be easier if the position name is first in the measurement file name.
Avoid Identical Names for Subs and Listening Positions
It's essential to avoid duplicate names between the listening positions and the subs. For instance, if you have both a sub and a listening position in the left front, you don't want to use a measurement name like "LF-LF". Instead, use a name like "LFPos-LFSub", so that the position name is easily distinguishable from the sub name in the exported file name. This will help MSO's automatic name matching algorithm succeed and save you the work of doing the manual name association later.
Choosing the Main Listening Position (MLP) Name
Certain operations that you'll perform in MSO after your configuration has been created require that you specify which listening position is the main one, or MLP. These operations include:
- running an optimization.
- examining various types of errors in the Configuration Performance Metrics dialog.
When the Configuration Wizard creates the configuration, it checks to see if one of the listening position names you specified is "MLP" (in all caps). If it is, it automatically assigns that position to be the main one. If it is not, you'll need to do this assignment manually later before running an optimization or using the Configuration Performance Metrics dialog. Naming your MLP as such in this part of the process will save you that extra manual step later.
If manual assignment of the MLP is needed later, MSO will give you a warning message when you try to run an optimization or launch the Configuration Performance Metrics dialog. This message will contain instructions for how to specify the MLP manually.
Exporting Measurements
When exporting text files from your measurement software, care is needed regarding the format of the exported files. MSO tries to accommodate certain older software that exports measurement text data according to the conventions of the user's locale. This means that the decimal separator could end up being a comma, rather than a "dot" character. MSO can accommodate this, but doing so means that MSO cannot accept data in comma-separated values (CSV) format. If possible, export your data using spaces or tabs to delimit the column data. If you do that, MSO will handle the use of a comma as a decimal separator without trouble.
Let's see how we'd export these measurements from a hypothetical REW project for import into MSO. We'll assume that the REW measurements are all named as in the figure above. In REW, choose File, Export, Export all measurements as text.
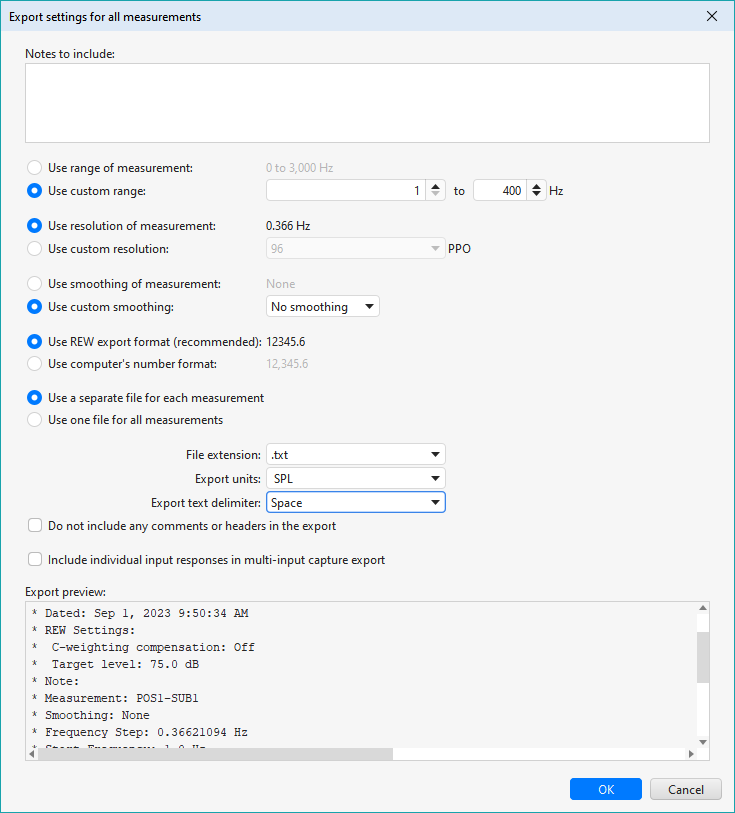
When exporting, choose all the options shown in the image. You can use spaces or tabs for the export text delimiters. Do not choose commas or semicolons for the delimiters.
If you were to perform this operation and choose a directory for the export, you'd end up with the following files in the export directory.
MLP-SUB1.txt
MLP-SUB2.txt
MLP-SUB3.txt
MLP-SUB4.txt
POS1-SUB1.txt
POS1-SUB2.txt
POS1-SUB3.txt
POS1-SUB4.txt
POS3-SUB1.txt
POS3-SUB2.txt
POS3-SUB3.txt
POS3-SUB4.txt
The measurement names from REW carry over to the exported measurement files.
Running the Wizards to Import Measurements and Create Configurations
Downloading the User Guide Examples: The data for this demonstration are available as getting_started_user_guide.zip. To get results that match the examples, please download and unzip this file before beginning if you haven't already.
Let's run the Measurement Import Wizard and the Configuration Wizard on these example files. Choose File, Measurement Import Wizard from the MSO main menu. This will display the first page of the Measurement Import Wizard as shown below.
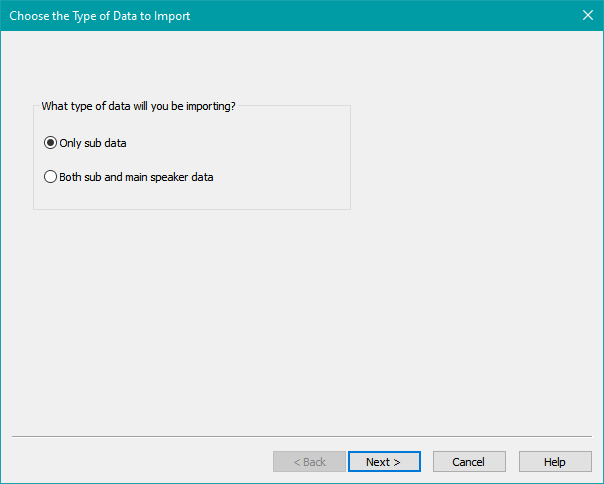
After choosing Next on the Choose the Type of Data to Import wizard page above, you'll be presented with the Sub Measurements to Import wizard page shown below.
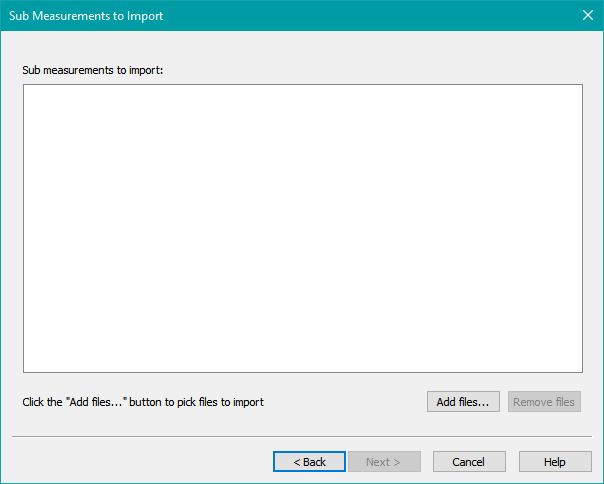
When you click Add files..., you'll be presented with a standard Windows File Open dialog as shown below. Select the files you wish to import, then click Open to add them.
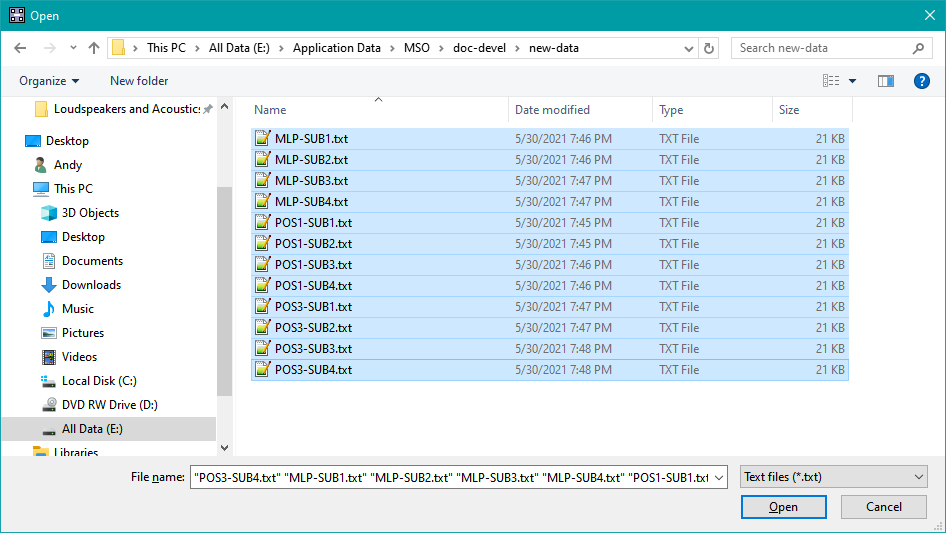
When you choose Open, the files won't be imported yet, just added to the File Import wizard page as shown below.
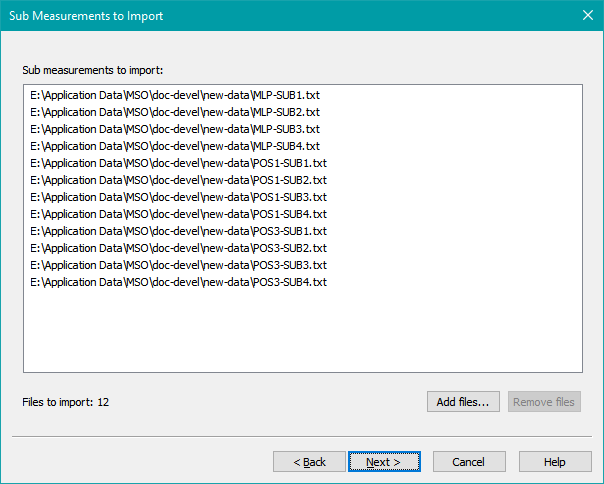
Since the files haven't been imported yet, you can add files you may have missed using the Add files... button, or remove files you may have accidentally added by selecting the files to remove, then using the Remove files button.
After clicking the Next button on the above File Import wizard page, you'll be presented with the following wizard page.
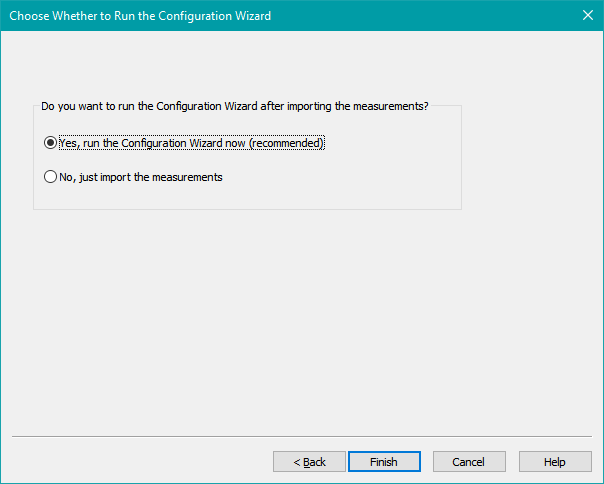
Choose the option to run the Configuration Wizard to create a new configuration right away. When you press Next, the files you've chosen will be imported and the Configuration Wizard will be launched. You'll be taken to the Enter Subwoofer Count page.
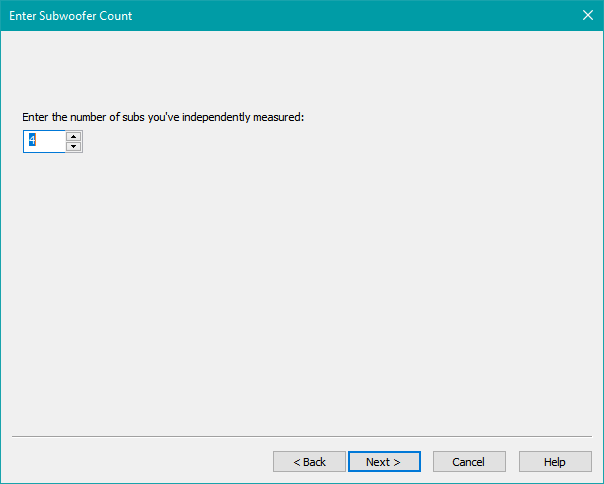
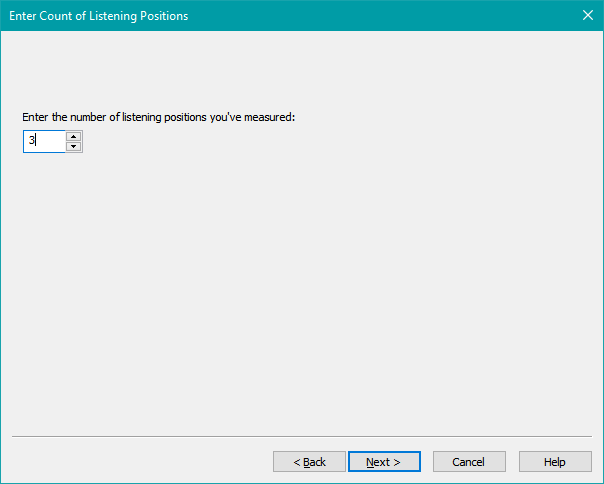
After you've specified the number of subs you've independently measured (four in this case) and pressed Next, you're presented with the Enter Count of Listening Positions wizard page as shown below.
After choosing the number of listening positions you've measured and pressing Next, the Choose a Unique Name for Each Sub wizard page will be shown as below.
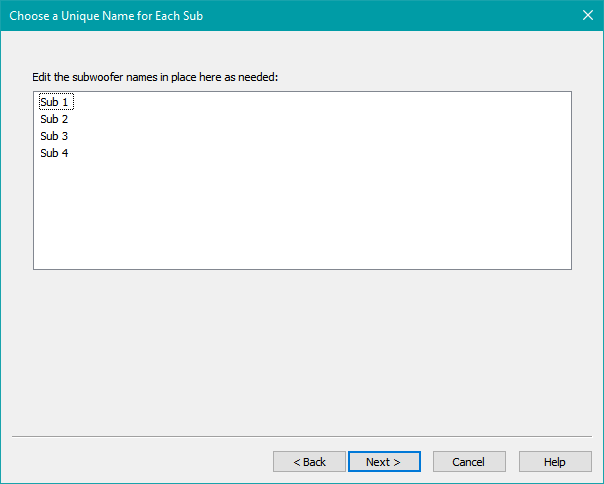
These names are automatically generated by MSO, so they may not match the sub names in the measurement files. In this case they do, so we can keep them. These names should be similar to that portion of the measurement file name that identifies the sub name. Although the file names use Sub1, Sub2, Sub3 and Sub4 (without spaces) as the sub names, the automatic matching algorithm ignores spaces, punctuation and capitalization when it tries to match the sub names with the measurement names.
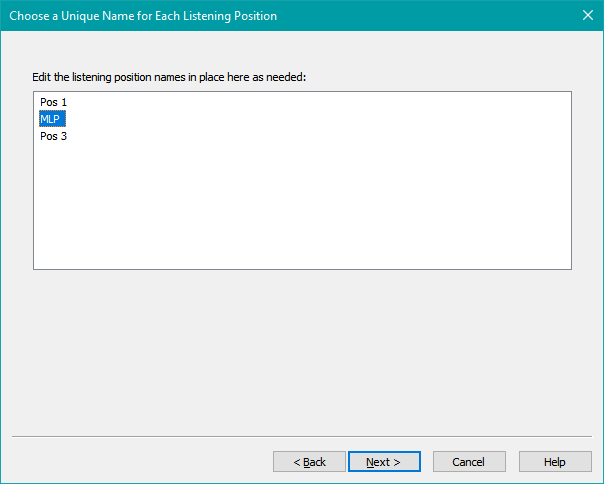
After pressing Next, you'll be presented with the Choose a Unique Name for Each Listening Position wizard page as shown below.
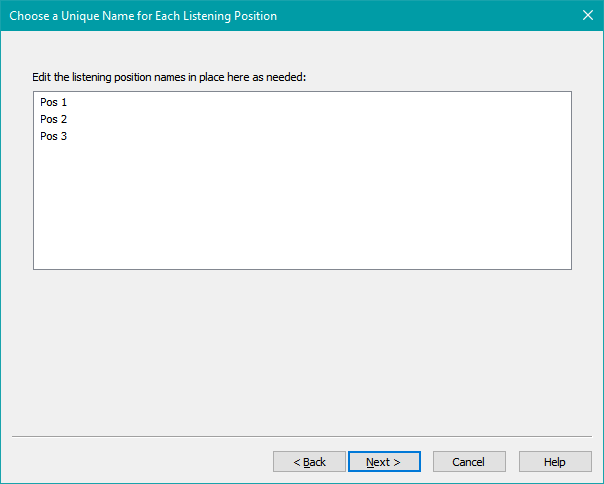
Here, the automatically generated position names "Pos 1" and "Pos 3" will match up with "POS1" and "POS3" in the measurement file names, but "Pos 2" will not. Instead of "POS2" in the measurement file names, we have "MLP". Let's try keeping "Pos 2" as the second listening position anyway to see what happens. Press Next to continue.
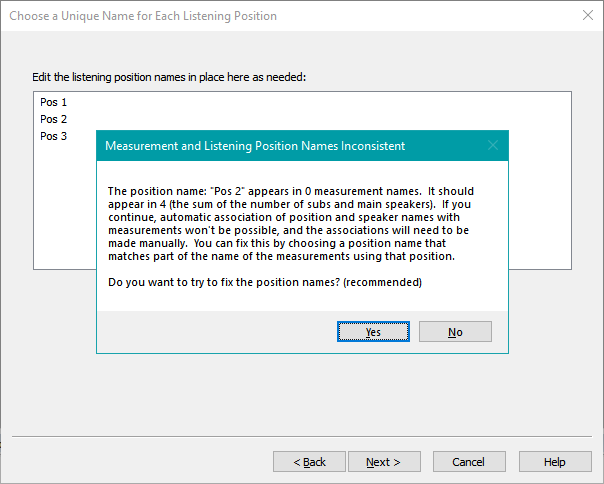
Let's choose No to ignore the problem, then choose Next.

None of the combinations of listening positions with subs are assigned to a measurement. If this happens and you don't do anything to fix it, you'll need to manually choose the measurement name for each combination of listening position and sub. This isn't too bad for small projects like this one, but for larger ones with many subs and many listening positions, it becomes tedious and time-consuming. That situation can be avoided by entering data that's compatible with the algorithm that automatically does the assignment. Let's go backward through the wizard to try to fix this problem. Press Back.
Replace "Pos 2" with "MLP" for the position name to match what's in the measurement file names. When we choose Next, there is no more error message, and the Measurement Associations wizard page appears as below.
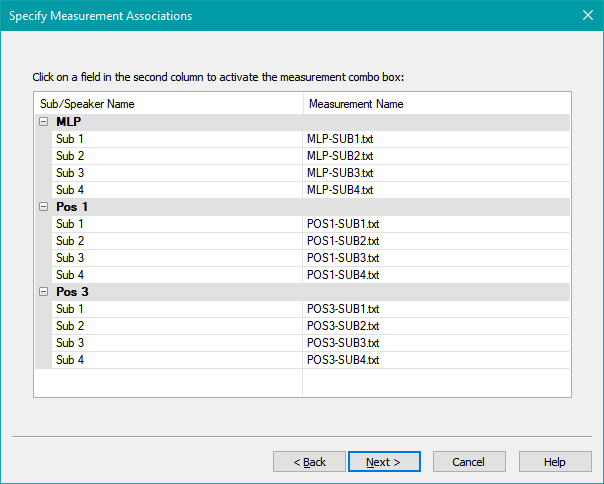
Now the automatic matching has done its job, and no manual matching of position and sub names with the corresponding measurement names is needed.
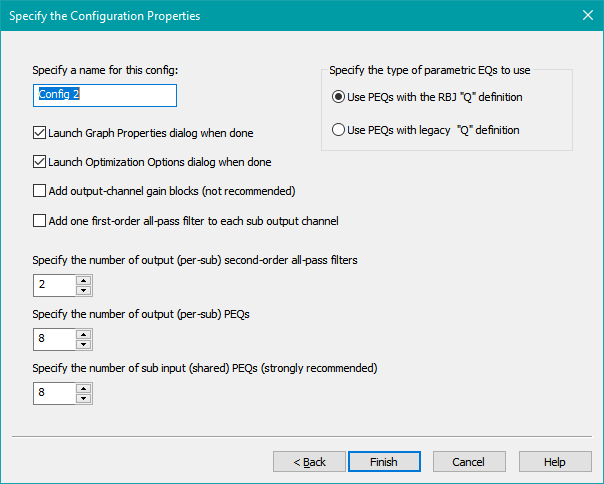
Pressing Next takes you to the Configuration Properties wizard page shown below.
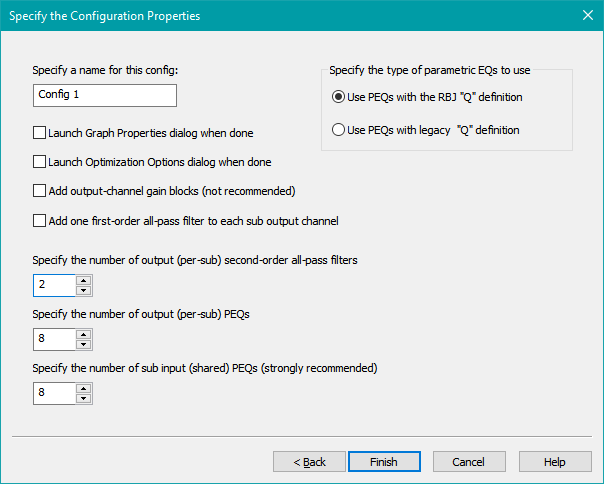
By default, the Launch Graph Properties dialog when done and Launch Optimization Options dialog when done options are checked. For the purposes of this introduction, uncheck them. Those two dialogs are complex and require detailed explanation, which we'll do later in the User Guide. For use later in the User Guide, make sure Specify the number of output (per-sub) second-order all-pass filters is set to 2. We'll look in depth at how these work later.
In fact, a complete description of all the options of this wizard page and reasons for using them is lengthy. These issues will be discussed later in the User Guide as well. For now, we just want to show how to get a project up and running as quickly as possible.
Press Finish to complete the wizard. The result is shown below.
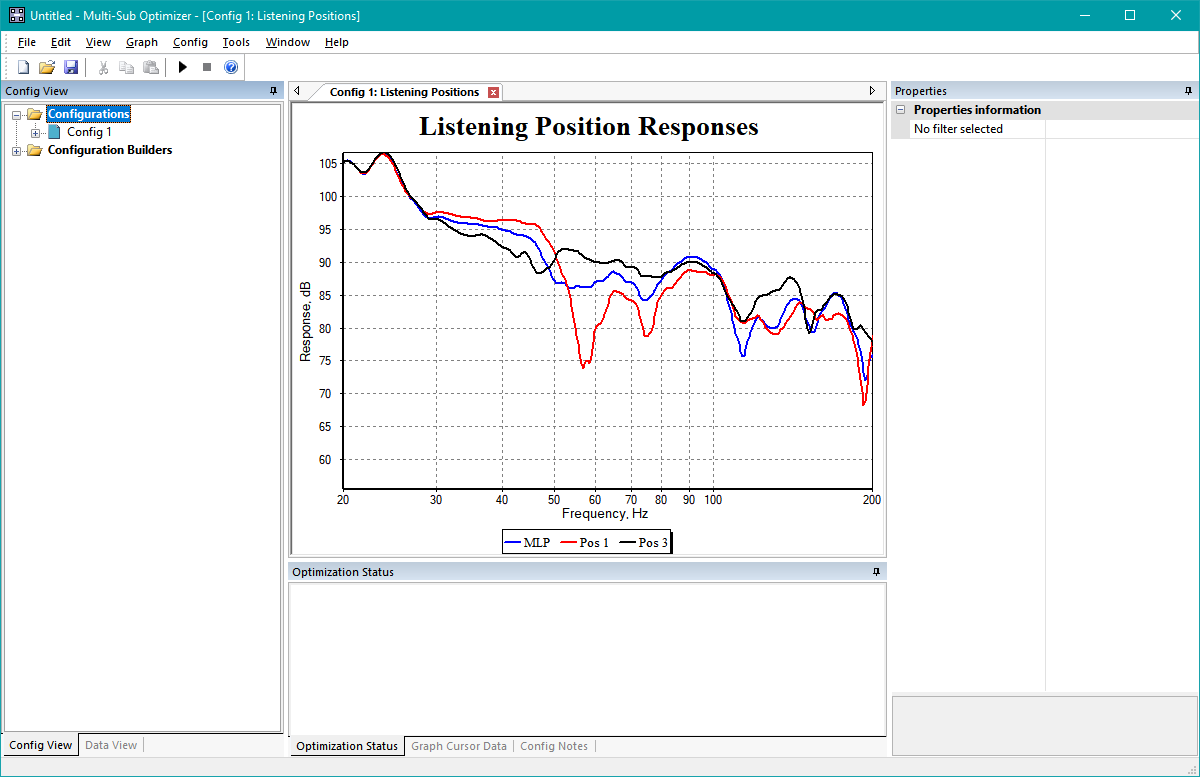
The project is now in a state where an optimization could be run, but real-world considerations require that many options be set before doing so. Explanation of all the options requires more detail than is appropriate for a "Getting Started" introduction. Those explanations are in the User Guide.
Before continuing, save this project as getting-started-1.msop. We'll use this saved project later in the Getting Started Guide and in the User Guide.
For now, let's see what happens when we run the Configuration Wizard once more to create a second configuration.
Running the Configuration Wizard More Than Once
Recall that we began by running the Measurement Import Wizard. This was done by choosing File, Measurement Import Wizard from the MSO main menu. The Measurement Import Wizard launched the Configuration Wizard when it completed. If we were to try to run the Measurement Import Wizard again, we'd find its menu command to be disabled. That's because the measurements have already been imported. However, we can launch the Configuration Wizard directly by choosing Config, New From Wizard from the main menu.
But before doing that, let's go back to an earlier discussion about configuration templates. A configuration template is created automatically after the first run of the Configuration Wizard, and makes additional runs of the Configuration Wizard simpler. The figure below demonstrates what happens when we right-click on the tree node named Sub-only template 1 (shown below) and choose Properties. This command displays a dialog showing the contents of the configuration template created by the Configuration Wizard.

The display of the properties of the configuration template should look familiar. All the relationships between listening position name, sub name and measurement name that we had to specify in the Configuration Wizard have been saved for us. When we run the Configuration Wizard a second time, it uses this information from the configuration template to reduce the amount of data we have to enter.
Let's try that now. Choose Config, New From Wizard from the main menu. The Configuration Wizard is launched, and displays the wizard page shown below.
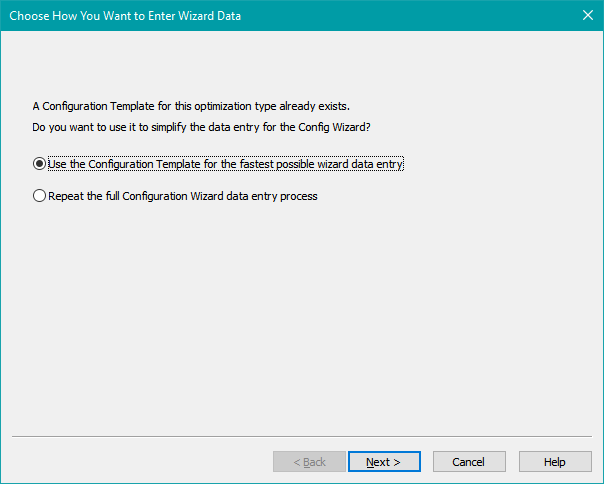
Choose Use the Configuration Template for the fastest possible wizard data entry and press Next.
We have been taken to the final page of the Configuration Wizard without having to enter any additional data. Press Cancel instead of Finish to prevent a second configuration from being created.
In the next section, we'll look at details of how to set up our graphs to display the data with the appearance we want.