Adding Filters, Delays and Gains
How to Manually Add Filters to Filter Channels
Once you add filter channels, you can add filters, delays and gains to them. To do so, right-click on the Filters category node under the newly-created channel. This presents a context menu allowing the addition of various filter types as shown below.
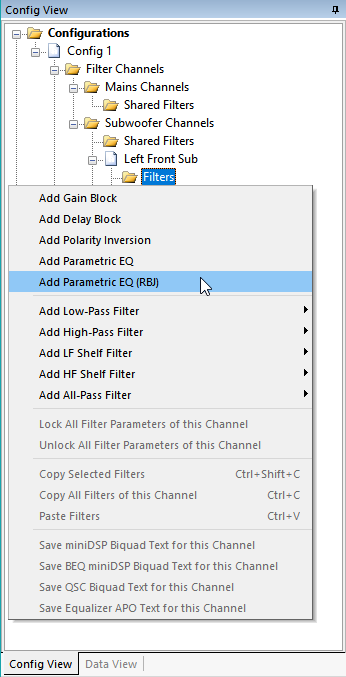
Delays, gains and polarity inversions are considered "filters" for the purpose of adding these items to filter channels.
Adding Multiple Filters Using Copy and Paste
When setting up a configuration with multiple subs, you'll almost always want to add a number of parametric EQ filters to each sub channel. If you have four subs and you want to add, say, six parametric EQ filters to each of the four sub channels, that would mean invoking the context menu described above twenty-four times. Fortunately, there is a better way. Once you have added one filter via the context menu shown above, you can copy it and then paste it as many times as you need to. This is illustrated below.
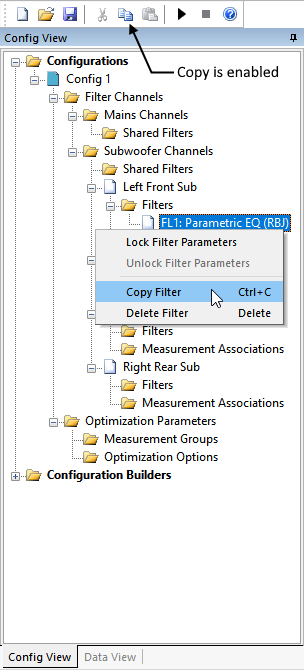
When a filter is selected, you can copy it using Copy command on the context menu as shown above. You can also use the Copy toolbar button. When an item in the Config View can be copied, the Copy toolbar button is enabled (shown in color). But by far the quickest way to copy the filter is to just select it and press Ctrl+C, rather than using the context menu. This context menu is only shown above to illustrate the alternatives. To paste the filter, select the Filters node of the channel. This is shown below.
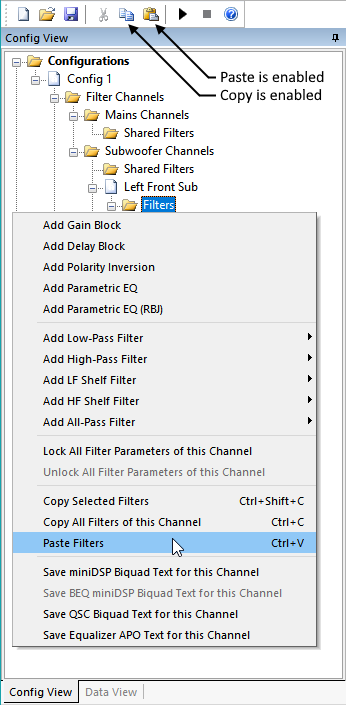
Although you could paste the filter using the above context menu, it's much easier to just press Ctrl+V to paste the filter as many times as needed while the Filters node of the channel is selected. The purpose of showing the context menu is just to illustrate the other options available.
Notice that not only is the Paste command enabled above, but also the Copy command. That is because when the Filters node of a channel is selected, you can copy either all the filters in the channel using Ctrl+C, or selected filters using Ctrl+Shift+C.
The Choose Filters to Copy Dialog
When you select the Filters node of a channel and press Ctrl+Shift+C or choose Copy Selected Filters from the context menu shown above, the Choose Filters to Copy dialog will be launched as shown below.
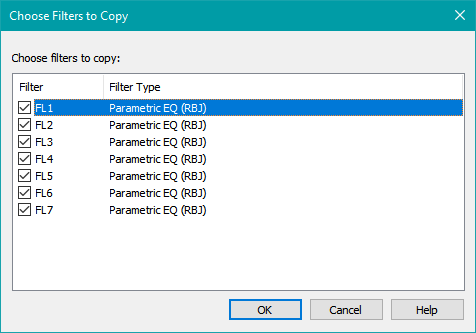
Use the mouse or a combination of the spacebar and keyboard arrow keys to select or deselect filters to copy to the clipboard. Press OK to perform the copy.
Summary of the Copy and Paste Process
Given our hypothetical case of a manually-created configuration for which we want six PEQs per channel, we can use this procedure to minimize the needed keystrokes.
- Add the first filter by selecting the Filters node of the first empty channel, then right-clicking to choose a PEQ filter to add using the context menu.
- Select the filter you just added and press Ctrl+C.
- Select the Filters node of the channel to which you just added the filter, then press Ctrl+V five times to get a total of six PEQs in that channel.
- With the Filters node of the channel still selected, press Ctrl+C to copy all the filters in the channel to the clipboard.
- Select the Filters node of an empty destination channel and press Ctrl+V. That will paste all six PEQs copied from the previous channel into the new channel.
- Repeat the step above to paste six PEQs into each of the remaining empty channels.
Restrictions on Delays and Gains
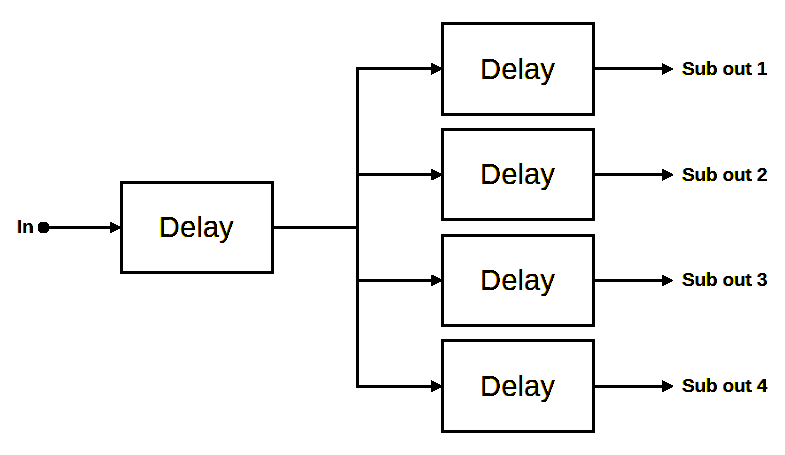
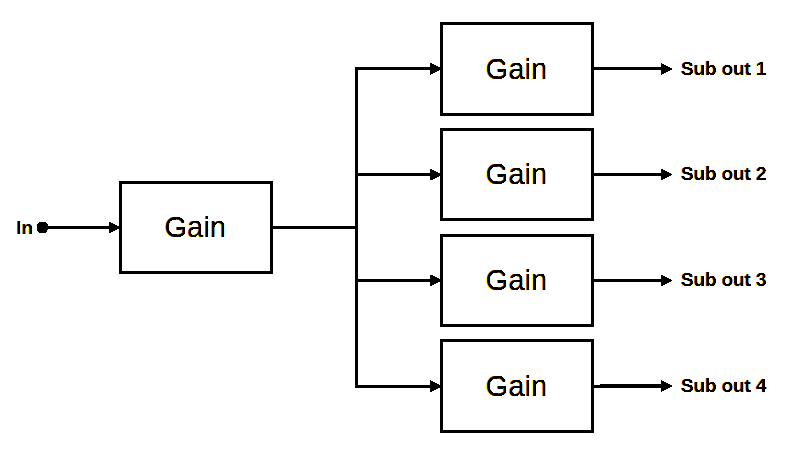
The filters available to add via the context menu depend on whether the chosen channel is a main or sub channel, as well as what filters have already been added to that channel in certain specific cases. For instance, once a delay has been added to an individual subwoofer channel, another cannot be added to that same channel, as this would cause problems for the optimizer. If a delay or gain cannot be added, MSO shows the menu item as grayed out. For example, attempting to create the configuration of delays shown in Figure 1 or gains shown in Figure 2 below is disallowed.
This can be remedied in several ways. One way is shown in Figure 3 below.
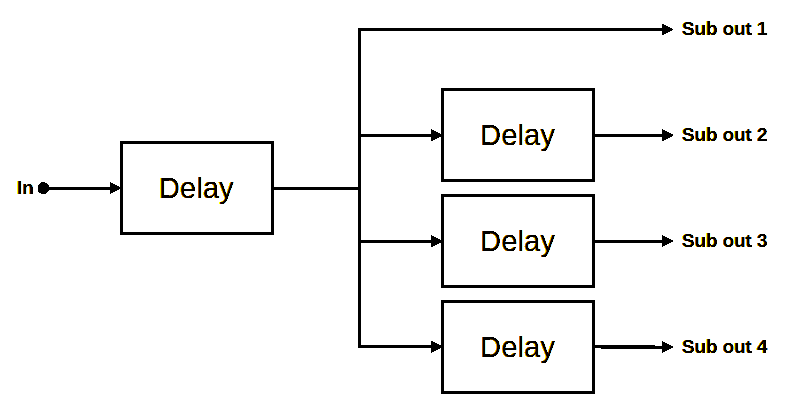
The configuration above is only allowed for subs+mains configurations. For sub-only configurations, shared delay blocks are disallowed.
A corresponding fix for the disallowed gain configuration of Figure 2 is shown in Figure 4 below.
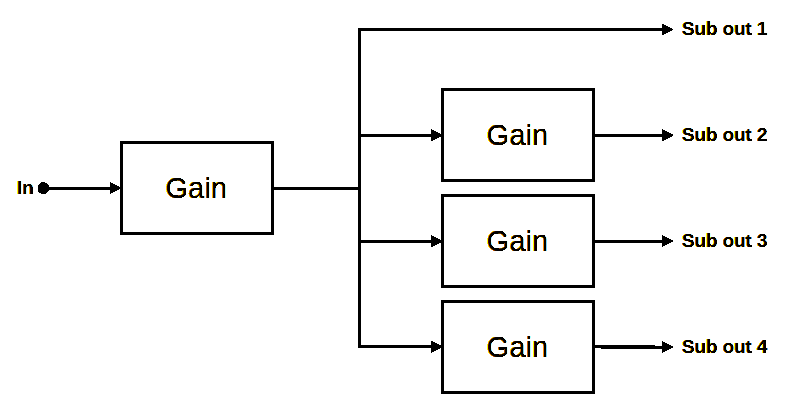
The leftmost delay in Figure 3 above represents a delay added to the Shared Filters node under Subwoofer Channels in the Config View of a subs+mains configuration, and is disallowed for sub-only configurations. If you try to add a delay to the Sub Out 1 channel of the configuration of Figure 3 in an attempt to obtain the configuration of Figure 1, you will find that MSO has disabled the menu option to add the delay. Any of the four channels in Figure 3 can be chosen as the one without a delay block. A similar set of restrictions applies to adding gain blocks.
Another permitted delay configuration (for subs+mains configurations only) is shown in Figure 5 below.
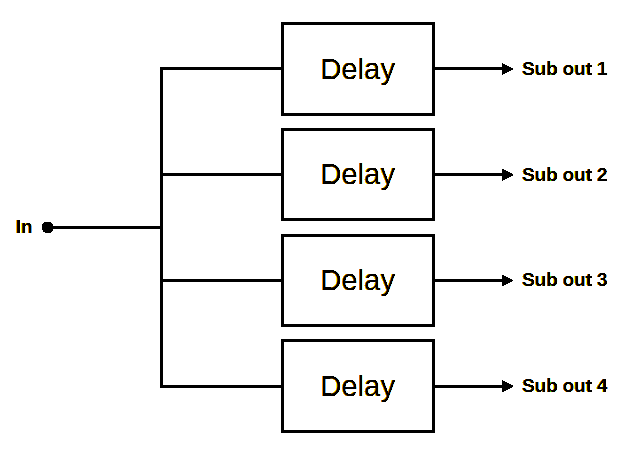
This configuration has no delay block under the Shared Filters node of Subwoofer Channels in the Config View. Allowing negative delays is permitted, and can be a useful technique if the delay implied by the AVR subwoofer distance setting used when the measurements were performed is larger than the optimum value.
Although the setup of Figure 5 is permitted in MSO (for subs+mains configurations only), the setup of Figure 3 with a shared delay block is preferable. A typical scenario is to have wide delay value limits for the shared delay block, with delay value limits covering a narrower range for the individual sub channels.
An exactly analogous situation exists with gains as well. MSO prevents configurations that will cause the optimizer trouble, and the preferred configurations for sub gains are shown in Figure 4 above and Figure 6 below.
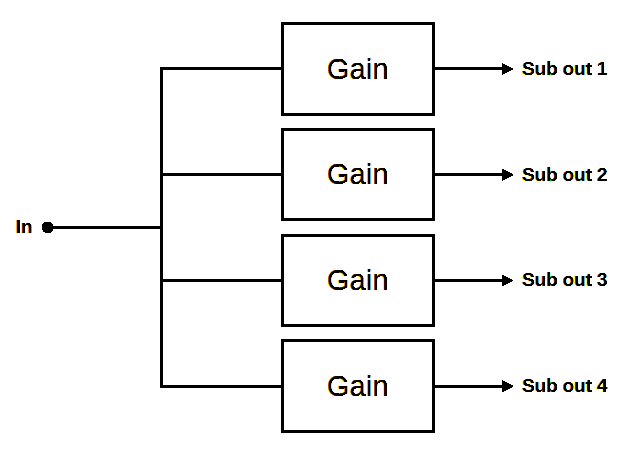
As with the delay setups of Figure 3 vs. Figure 5, the gain setup of Figure 4 is preferable to that of Figure 6 for a similar reason. It's desirable to have a wide allowable gain range for the shared gain block of Figure 4, with narrower allowable gain ranges for the individual gain blocks of Figure 4. In fact, with recent emphasis on maximizing SPL, individual gain blocks are no longer recommended. So the setup of Figure 4 with only a shared gain block and no individual sub gain blocks at all is the current best practice.
Delay Restrictions for Sub-Only Configurations
For sub-only configurations, only the relative delays between subs are meaningful. Any delay configuration such as Figure 3 or Figure 5 above implies a shared or common delay among all subs. But such a shared delay does not affect integration of the subs with one another at all. A shared delay is only useful for integration of subs with main speakers. With subs+mains configurations, such a shared delay models the sub distance setting of the AVR or pre-pro. Allowing such a shared delay for sub-only configurations would cause convergence problems for the optimizer, so they are disallowed. Therefore, for sub-only configurations containing N individually controlled subs, only N - 1 delays are permitted, as shown in Figure 7 below.
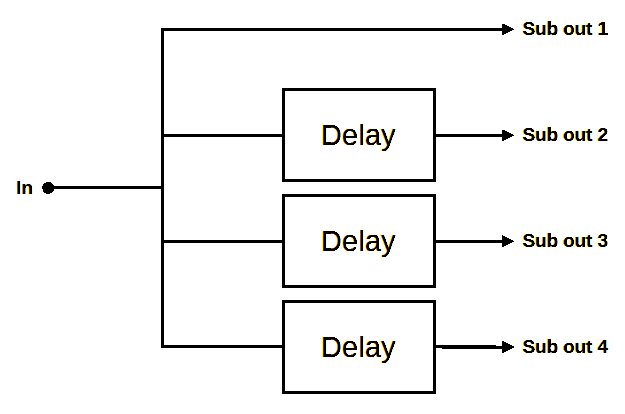
For sub-only configurations, it's necessary to figure out which sub channel should end up with no delay block. Instructions for doing this can be found in the Normalizing Delays subtopic of the "Tips and Tricks" section of the User Guide.
Delays and Gains Not Allowed in Main Channels
Delays and gains cannot be added to main channels. It's assumed that mains distance and level trims have been set correctly prior to performing measurements. Relative gain and delay are accomplished using adjustments to subwoofer channels only. Reductions in delay of the sub channels relative to the as-measured condition are accomplished by allowing negative delay values. A negative delay means that the delay should be reduced relative to the as-measured condition, which corresponds to increasing the subwoofer distance setting in your AVR from what it was when the measurements were performed. These distance changes will be shown at the end of the filter report, which you can view after the optimization is run. To enable the display of these distance changes, make sure System uses AVR or pre-pro with sub out is checked in the Hardware, Filter Reports property sheet of the Application Options dialog. See Specifying Filter Report and Biquad Export Options in the User Guide.
Delay and Gain Restrictions When Pasting Filters
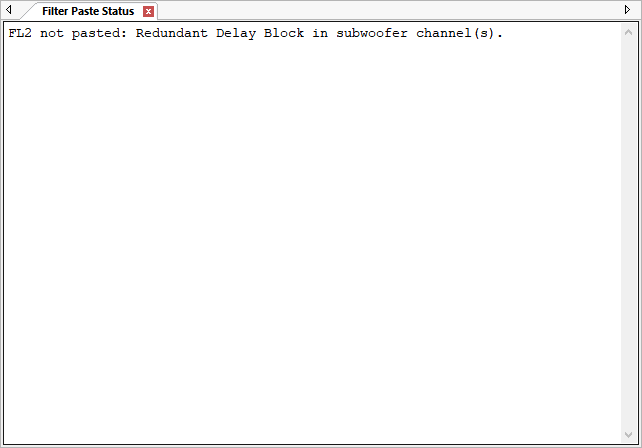
If you copy a filter or filters, then try to paste the filters into another channel, there are certain situations when pasting one or more of the filters would violate one or more of the restrictions above. If none of the filters in the clipboard are legal to paste into a given channel (like trying to paste a single low-pass filter into a main speaker channel), pasting into that channel will be disabled entirely. If some of the filters in the clipboard are legal to paste into the destination channel and others not, MSO will paste all the legal filters into the destination channel, then display a tabbed text window showing what filters were not pasted and why. An example is shown below.
